
Appointments is the new SRNA feature which helps you manage your store in a variety of different ways listed below:
- Appointments helps you roster the correct amount of staff based on the number of expected appointments per day, minimising your overall missed opportunities.
- It also reduces average customer wait time allowing your store to become a more efficient and effective money-making machine while also improving overall customer experience
- Appointments also allows you to meet and maintain the new COVID-19 operating guidelines by giving foresight into how many customers are expected to be in your store at a single point in time.
- And much much more ...
On this page, we will detail the new release of Built-In Appointments System. Please note: Using calendly means each store will need its own calendly account. There will be a demonstration of this further in this guide.
Enabling Appointments for your store
To enable appointments at your selected store(s) please follow the steps below:
- Click the cog (settings) icon in the left menu bar
- Select the store settings option
- Select the store you would like to apply this to
- Scroll down to the appointments settings section and click on the enable button
- Scroll down the rest of the page until you find the save button, then click it.
- Voila! You now have appointments enabled in your store, enjoy!
Configuring the Appointments module
With the appointments module, there are some more adjustments you can make to customize the usability of the appointments module. These settings include availability ranges and email settings. The settings can be found within the store settings of the store you want to edit the appointments of. Here is what the panel should look like:
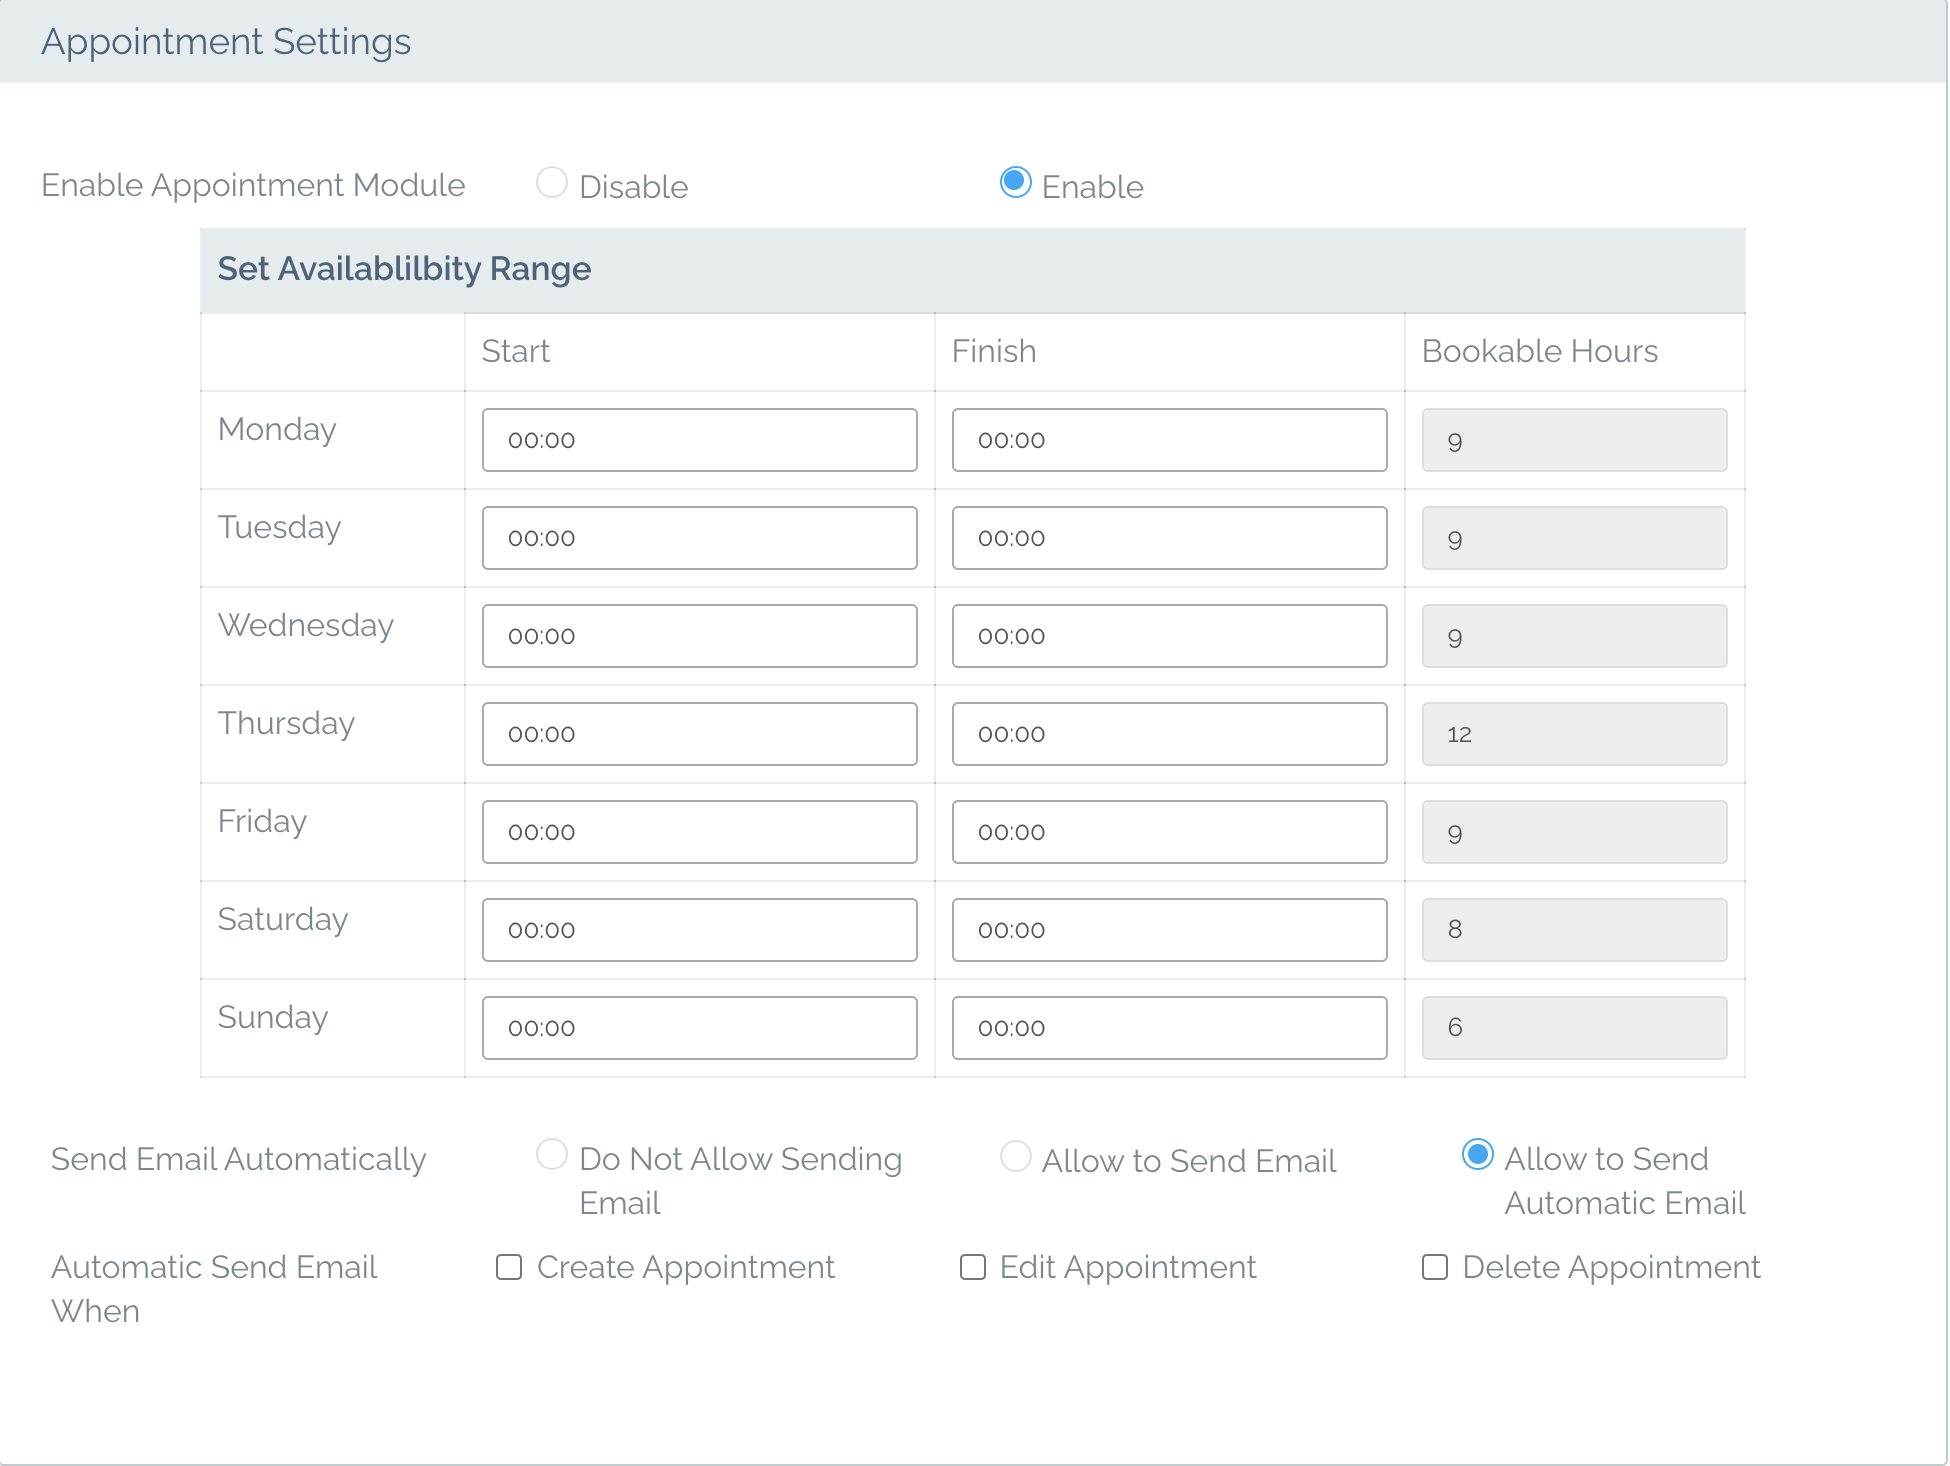
As you can see in the above image, you can set what start and end times you want to allow for appointments as well as if you want your staff being able to send emails on an appointment action or if you want it to send an email with a separate configuration automatically.
Email Settings

The email settings can be set to Do Not Allow Sending Email, which will prevent any emails being sent to the customer whenever a booking is created, edited or deleted.
The Allow to Send email will prompt your staff members asking them if they want to email the customer upon creating, editing or deleting an appointment.
With the automatic option selected the customer and store will receive an email when the appointment is made, edited and deleted.
The Appointments Page
When you navigate the appointments page, you will see a calendar where you can view any appointments booked, created new appointments and edit or delete existing appointments. This calendar will automatically refresh every 2 minutes.
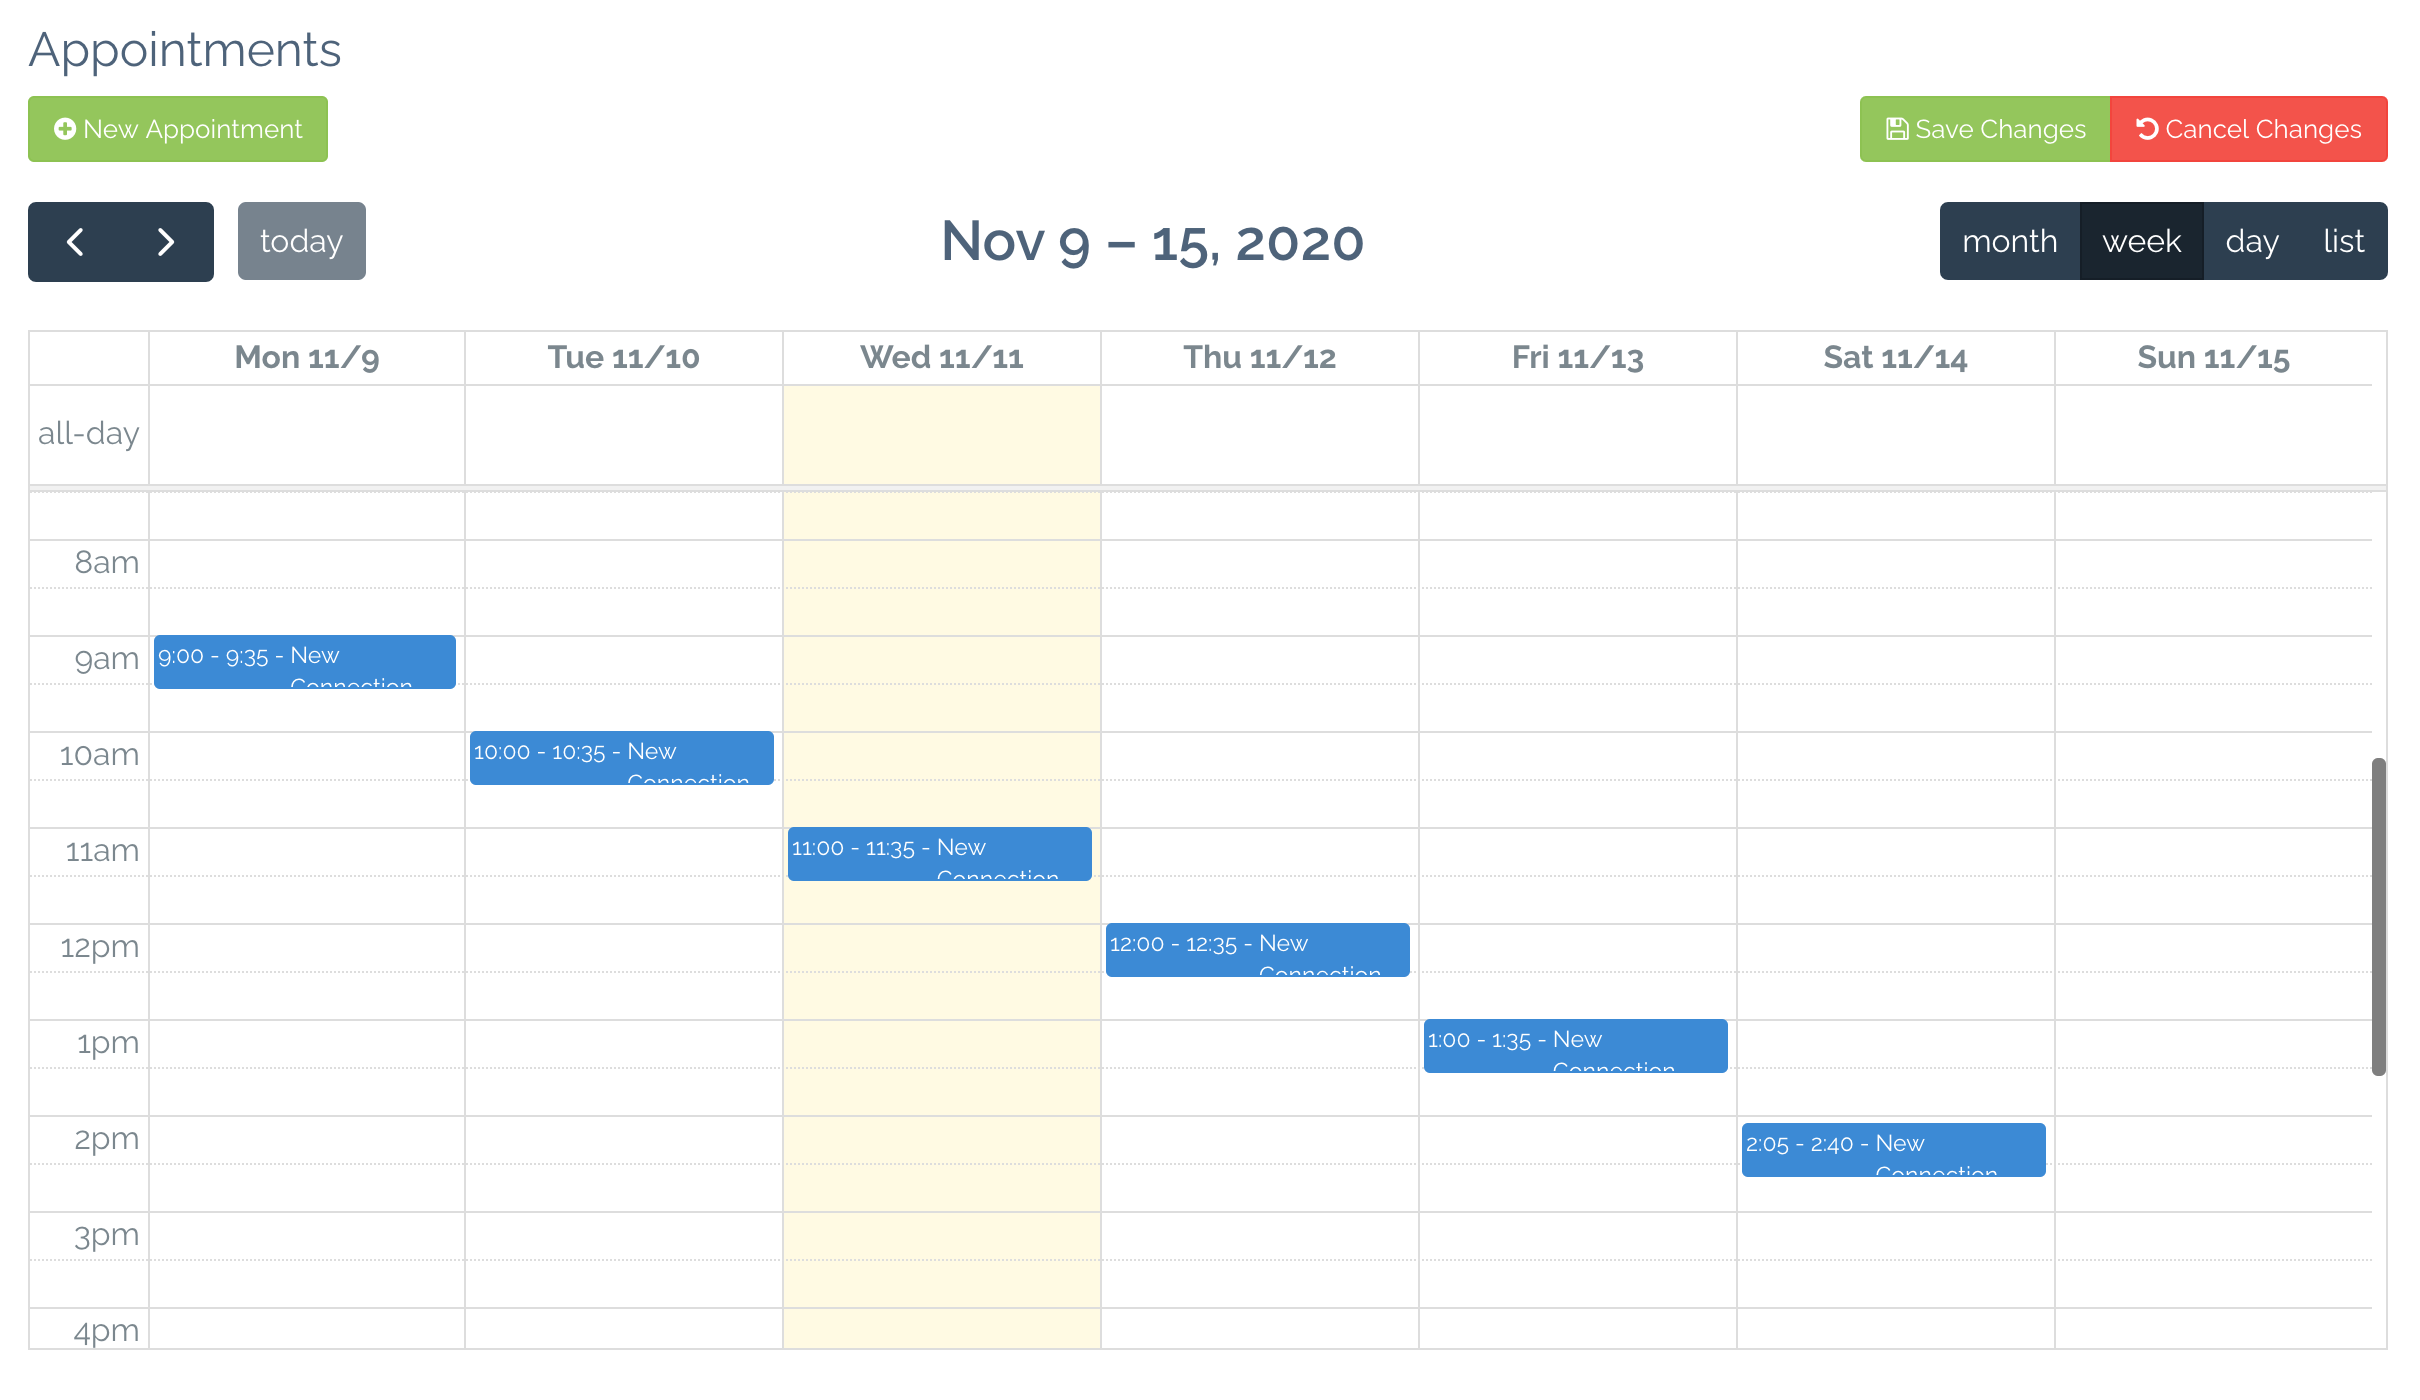
Creating appointments
Click the new appointment button (pictured above in green) atop the calendar view. This should bring up a ‘Create New Appointment’ Modal.

Here you can select a Customer, Appointment Type, Define an appointment name, select who the appointment is assigned to, and lastly the start time and duration of the appointment. Appointment types are predefined. If you require additional appointment types, please contact support. After selecting the Customer and Appointment Type, Appointment Name will autofill with a generated string.
Another way you can create the appointments without having to select the slot is by left-clicking and dragging to highlight a timeslot you want to book the appointment for, and then clicking new appointment; this will prefill the start and end time with a timeslot. When you select the appointment type if the event time is estimated to be longer than the duration selected it will automatically adjust the end time to suit the estimated duration, you can then proceed to fill out the appointment form, by selecting the customer, who the appointment is assigned to and changing the appointment name if you wish
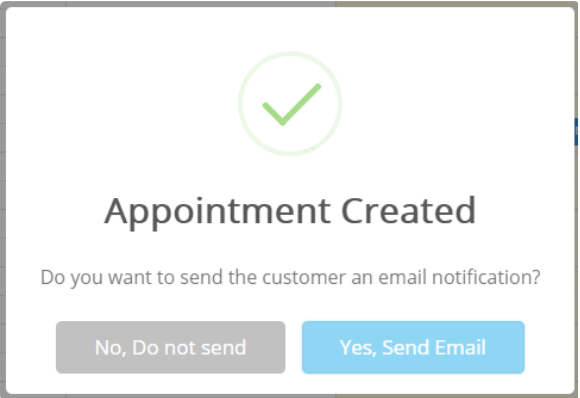
Note: After clicking the submit button, depending on the email options a modal may pop-up. The dialogue will pop-up if ‘Allow to Send Email’ has been selected in-store options. If ‘Allow to Send Automatic Email’ option or the ‘Do Not Allow Sending Email’ option has been selected no dialogue will pop-up. A similar dialogue will popup on other actions such as Edit and Delete if the ‘Allow to Send Email’ option is selected.
Viewing appointment details
To view the details of a booked-in appointment, left-click the appointment you wish to see the details of and a modal should pop-up and display the details of the appointment. Here is an example:
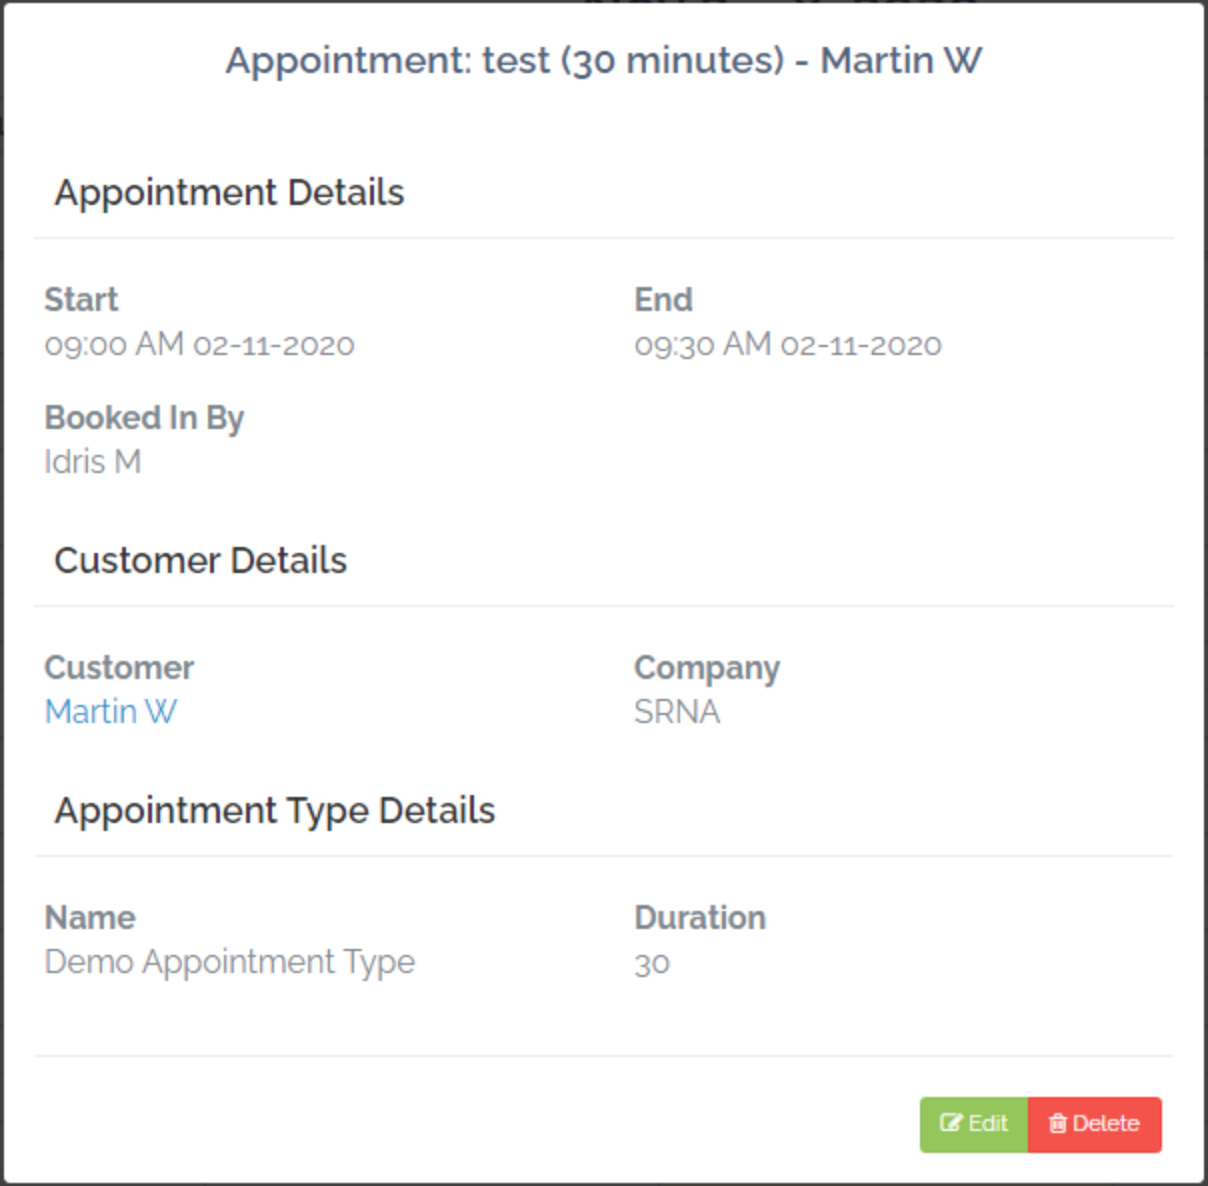
On the modal, you can click the customer name to view customer, as well as edit or delete the appointment.
Editing an Appointment
To edit an appointment, you need to click on the event you wish to edit and bring up the event details modal and then click the green edit button. This will bring up a modal similar to the new appointment modals with all the selected appointments pre-filled in. Make the changes you want and click the green submit button. After submitting as mentioned further up in the guide, depending on your email settings, you may be prompted to send an email to the customer.
Deleting an Appointment
To delete an appointment, like editing, you need to bring up the event details modal but clicking on the event. Click on the red delete button to delete; you’ll be prompted with a confirmation dialogue, click ‘yes’ to delete or ‘no’ to not to delete the appointment. This action cannot be undone. After clicking yes, as with the edit and create actions and depending on the store options, you may be asked to send an email to the customer.
Comments
0 comments
Please sign in to leave a comment.