
What is Calendly?
Calendly is an appointment scheduling service which takes all of the hassle out of booking in appointments, so you can say goodbye to all your missed opportunities because of social distancing guidelines.
Please note: Using calendly means each store will need its own premium (paid) calendly account. There will be a demonstration of this further in this guide.
How do I use it?
There are 4 easy steps to enabling Calendly in your stores with SRNA:
- Register an account on the Calendly website.
- Head over to SRNA >> Admin panel (cog icon) >> Select a store
- Click the green "Connect to Calendly" button
- You will now be redirected to a page which should confirm the integration was successful
Creating a SRNA Appointment in Calendly
- Each calendly account (Store) has one stream of events so when a customer navigates to your booking page they will have the option to select from the different types of appointments. Also, note that customers cannot double book timeslots
- If you want the ability to have more than one customer appointment per timeslot, you MUST make it a group appointment.
(Please note the view above may differ to the one on your screen)
- To easily create a calendly event, click the ‘View Event Types’ button which will open up calendly and either show a login screen or show your current event types.
- While on the calendly page, click the ‘+ New Event Type’ button and you should see this screen:
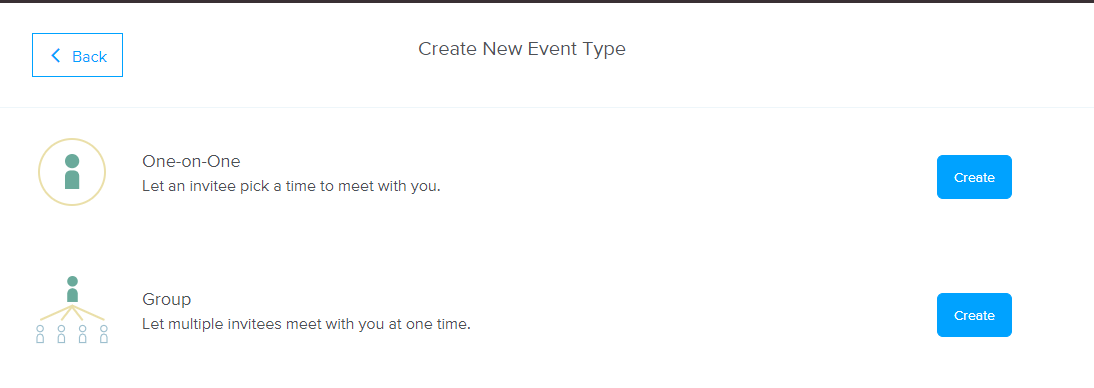
- Click create on the group option
-
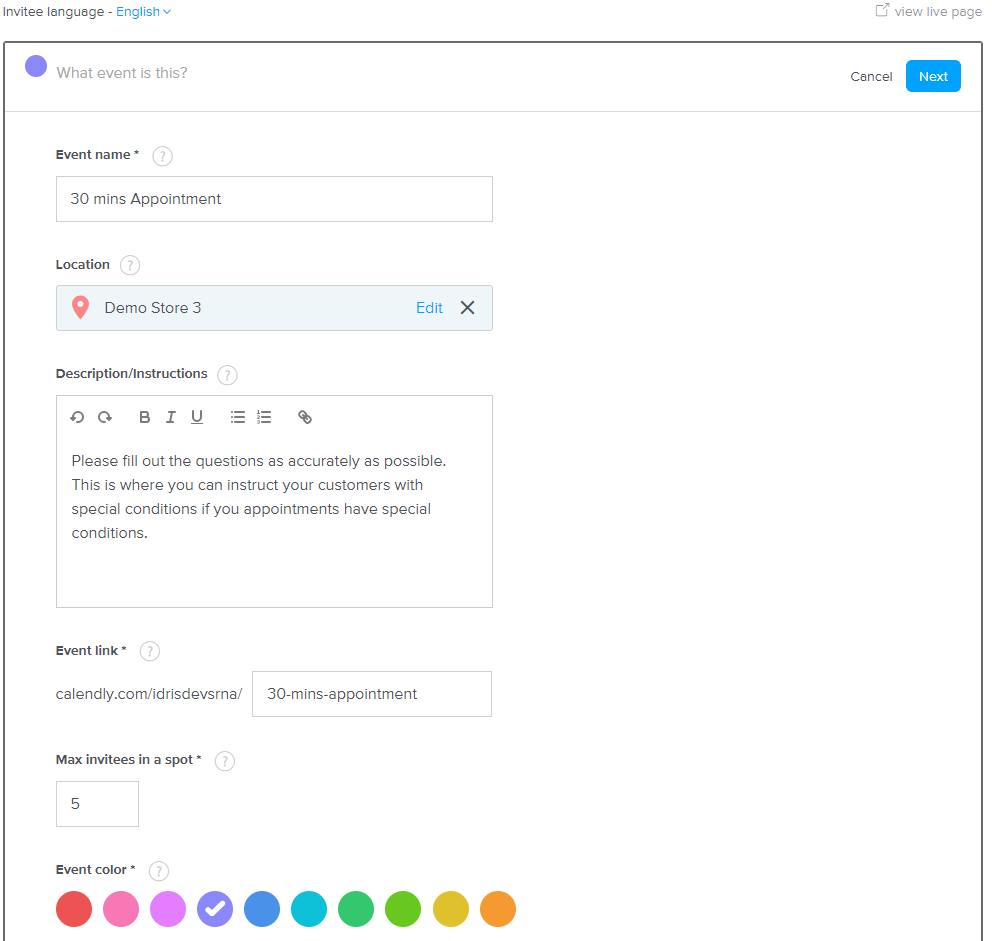
You now to need to fill out the form on the screen, the event name will be displayed on the calendar within the SRNA system as well as the booking page.
- In the location option, you can specify the store location
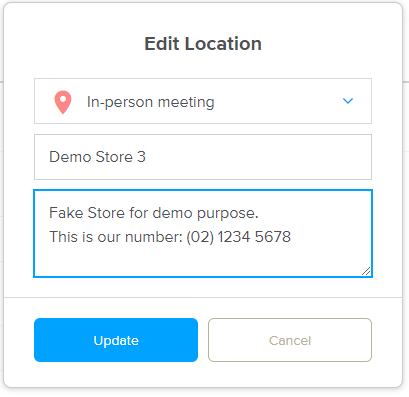
- The description/instructions field will be seen by the users.
- Below you can find an example of what the form should look like when it has been filled in
- Once you have done that, click next. You will now see a form relating to how long the appointment is what times you want to say that you are available and other options. You can go in-depth with the times, but for this guide, we will be keeping it default 30 minutes
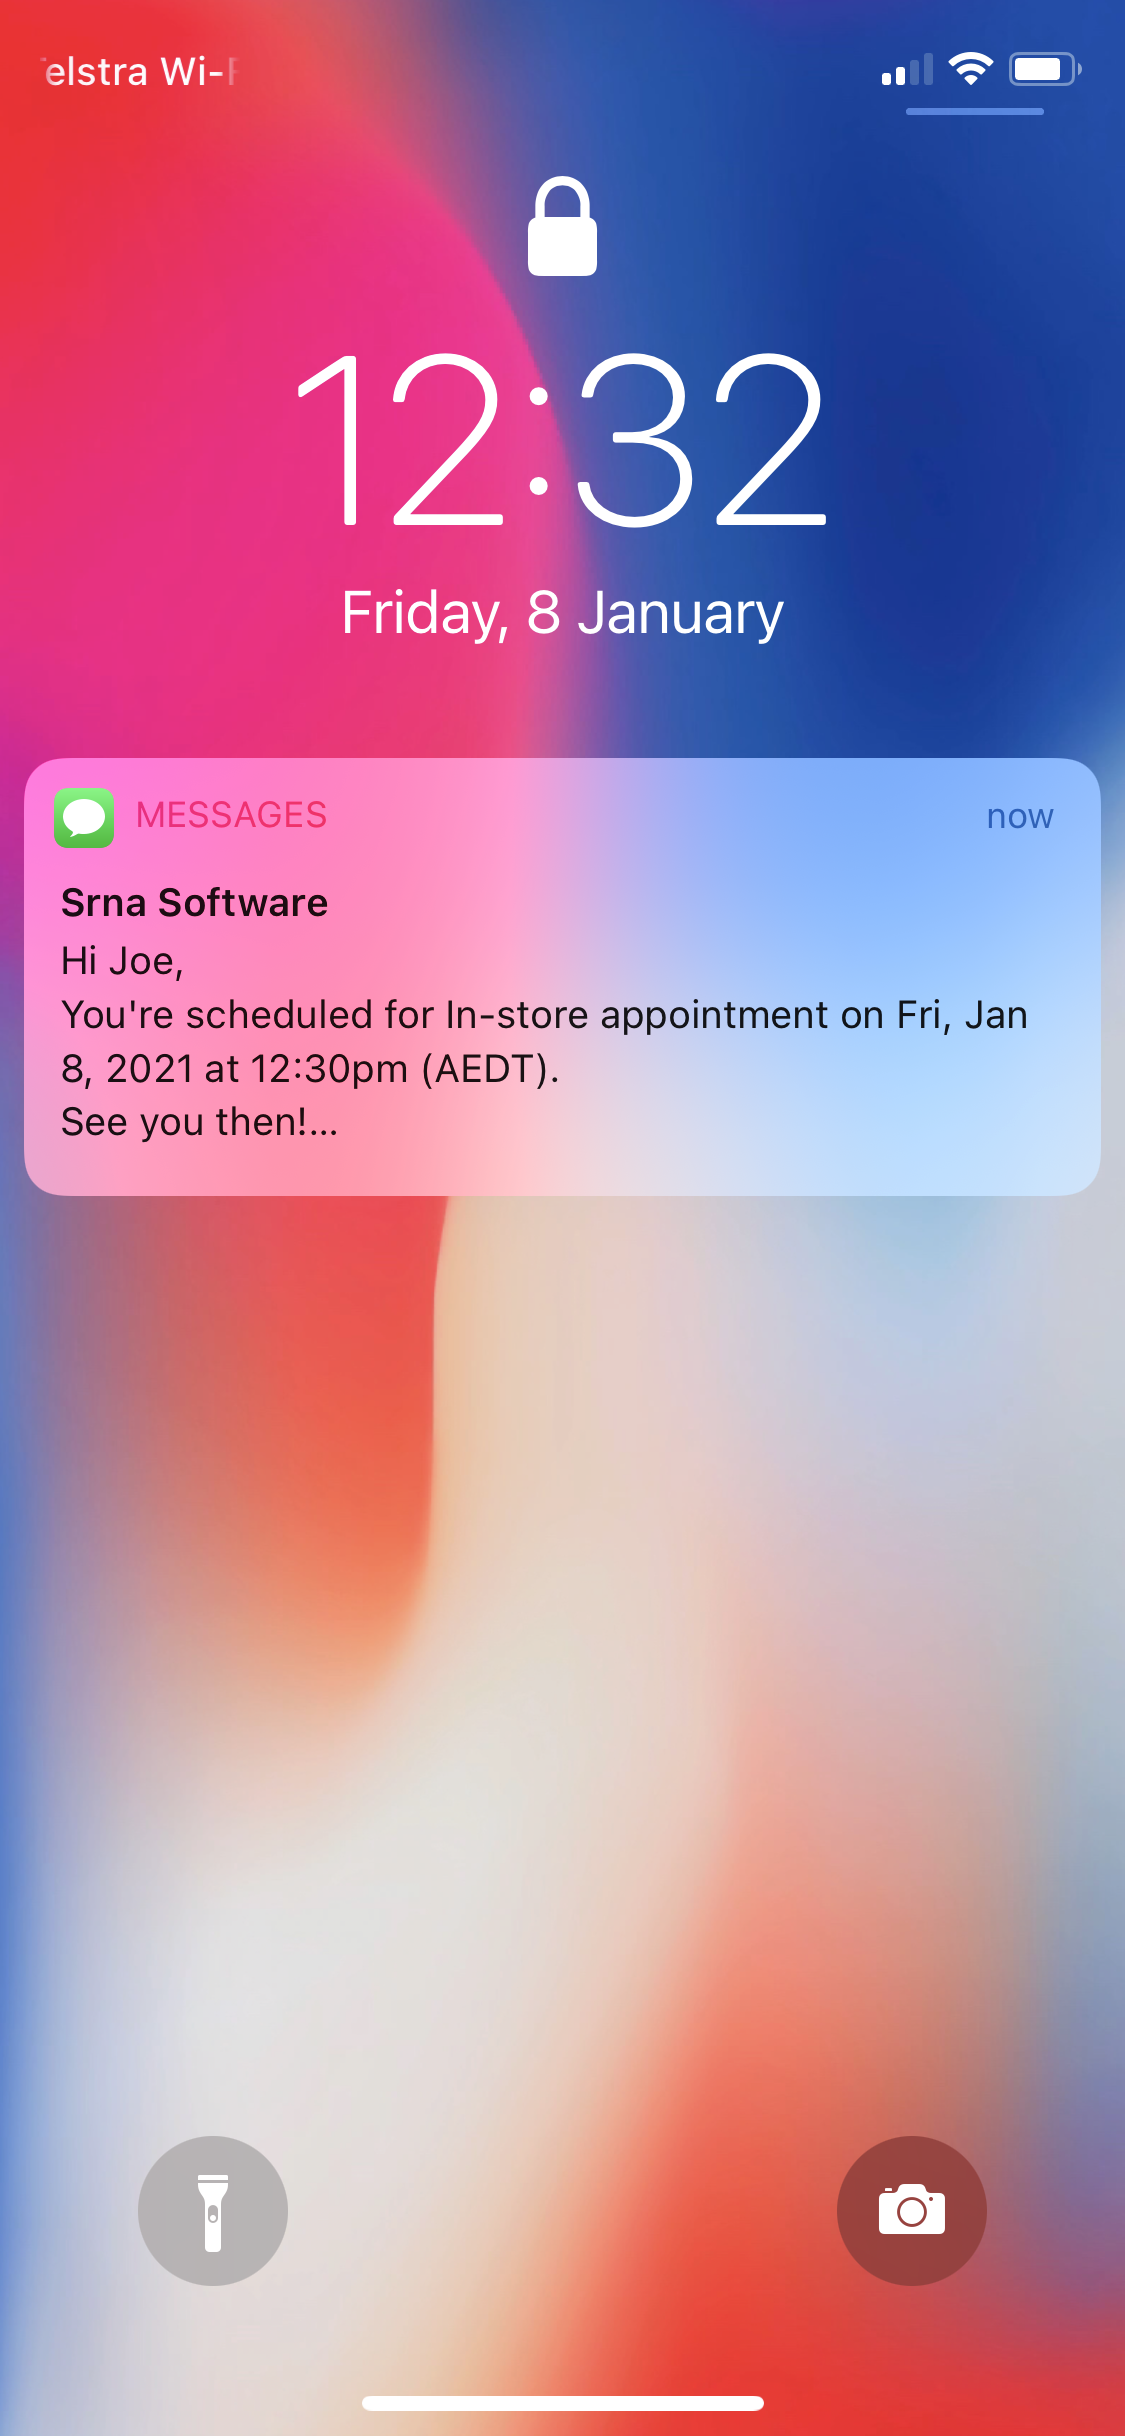
Customer SMS Example:
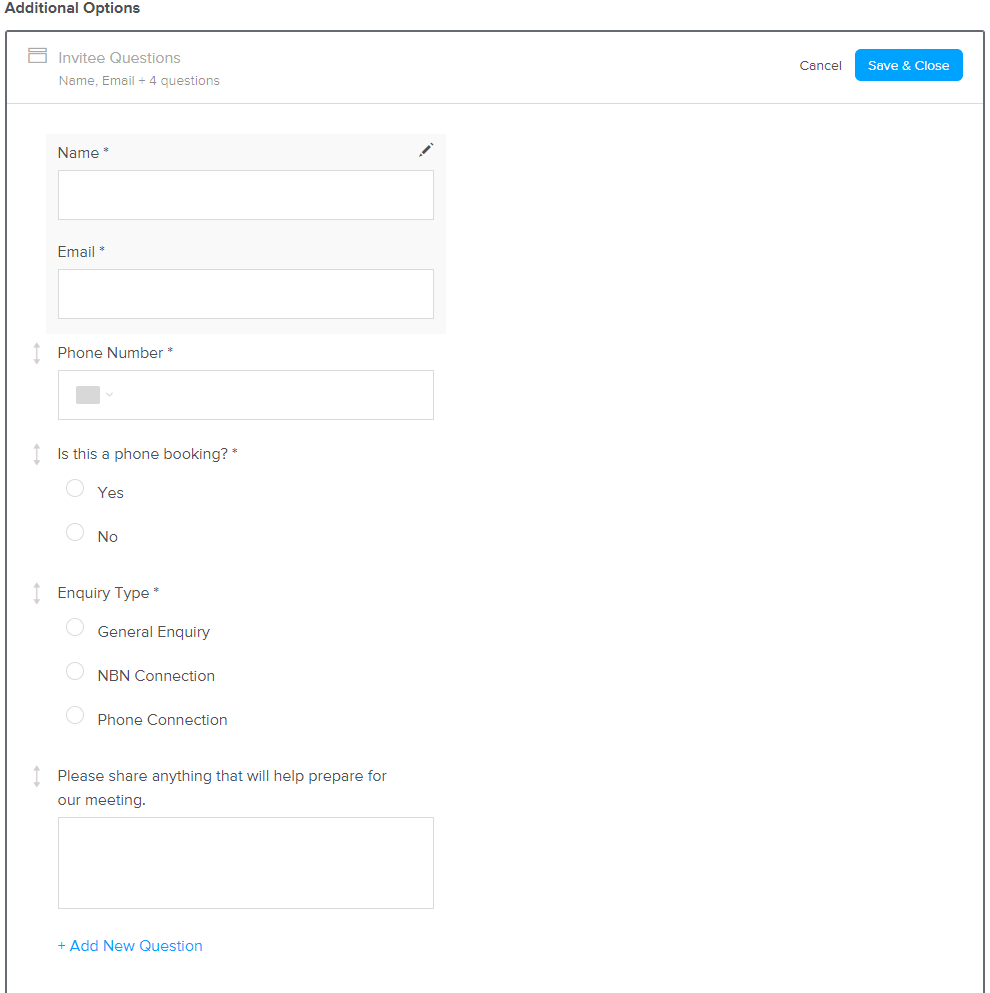
Additional Options:
To display extra details on event details (shown later), you will need to edit the Invitee Questions. With SRNA you have the ability to show extra details, here are the available options:
-
Phone Number
-
If the appointment is a phone booking (useful if you are using the group event type)
-
Enquiry Type
-
Notes
To get all these options to show (Or custom options of your choice), please create the questions with the same names as these:
Question: Phone Number
Answer Type: Phone Number
Required: Yes (ticked)
Question: Is this a phone booking?
Answer Type: Radio Buttons
Required: Yes (ticked)
Options:
- Yes
- No
Question: Enquiry Type
Answer Type: Radio Buttons
Required: Yes (ticked)
Options: (you can add as many as you want)
- General Enquiry
- New Connection
- Phone Connection
- NBN Connection
Question: Please share anything that will help prepare for our appointment. (by default this option should exist but saying ‘meeting’ instead of ‘appointment’, you can change ‘meeting’ to ‘appointment’.)
Answer Type: Multiple Lines
Required: No (not-ticked)
The final result should be a filled out form which looks like this:
Viewing Calendly Appointments
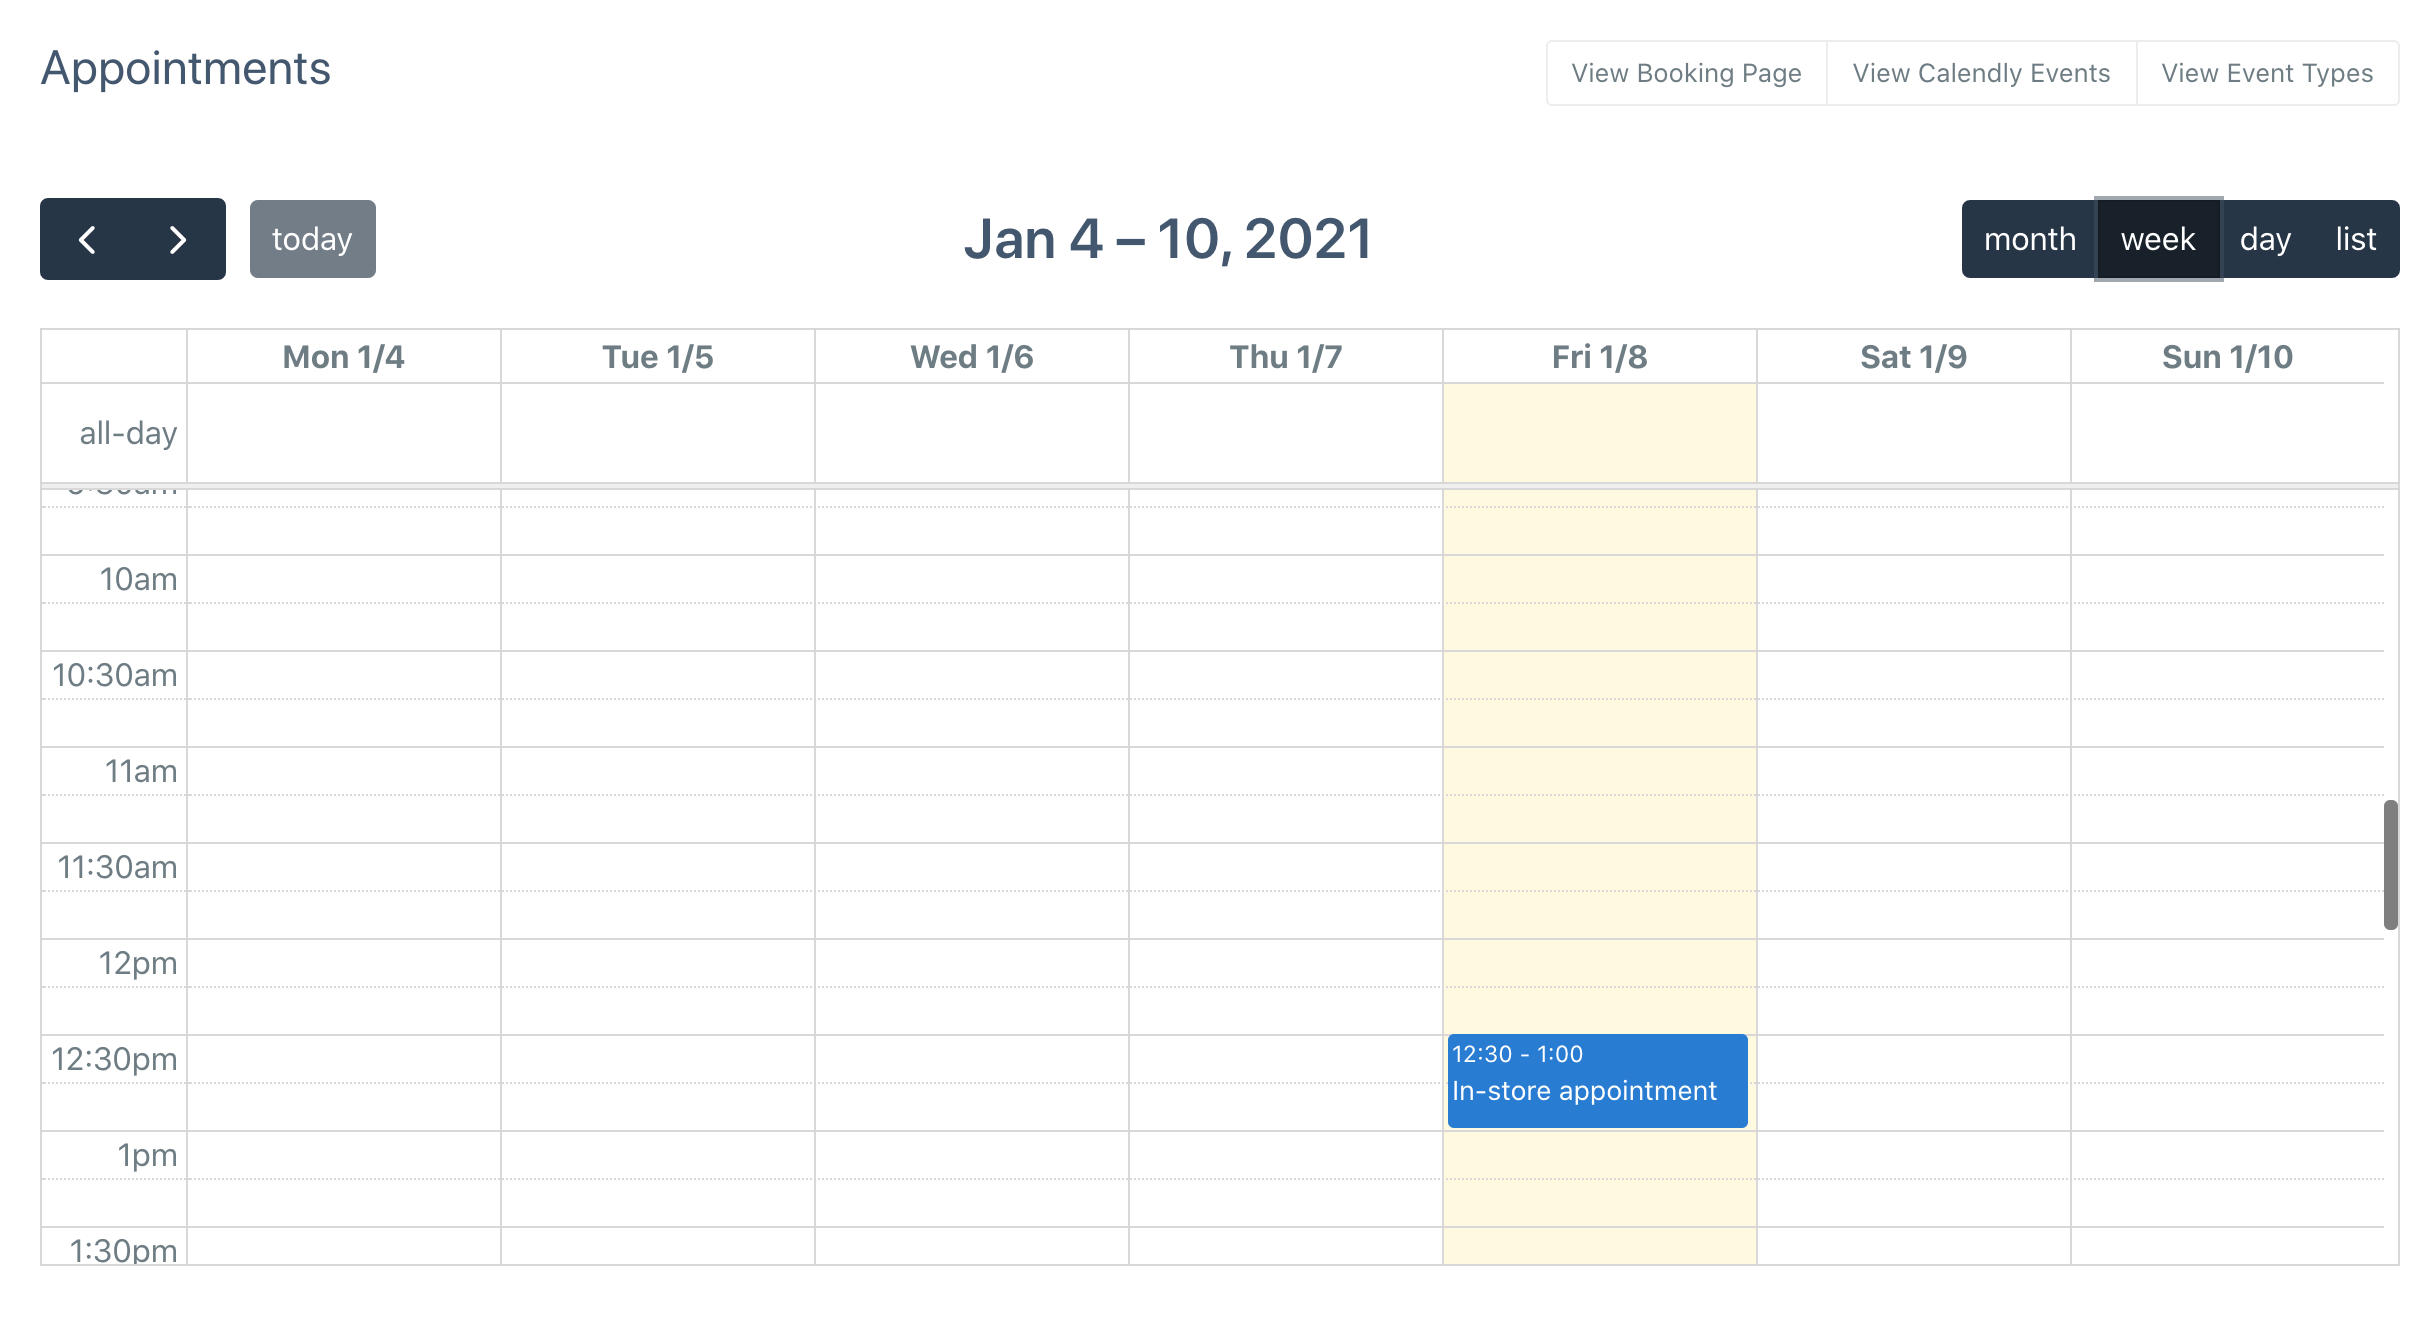
After a customer has booked in an appointment, your calendly appointments calendar will display a filled slot. The below example is from demoing our new appointment:
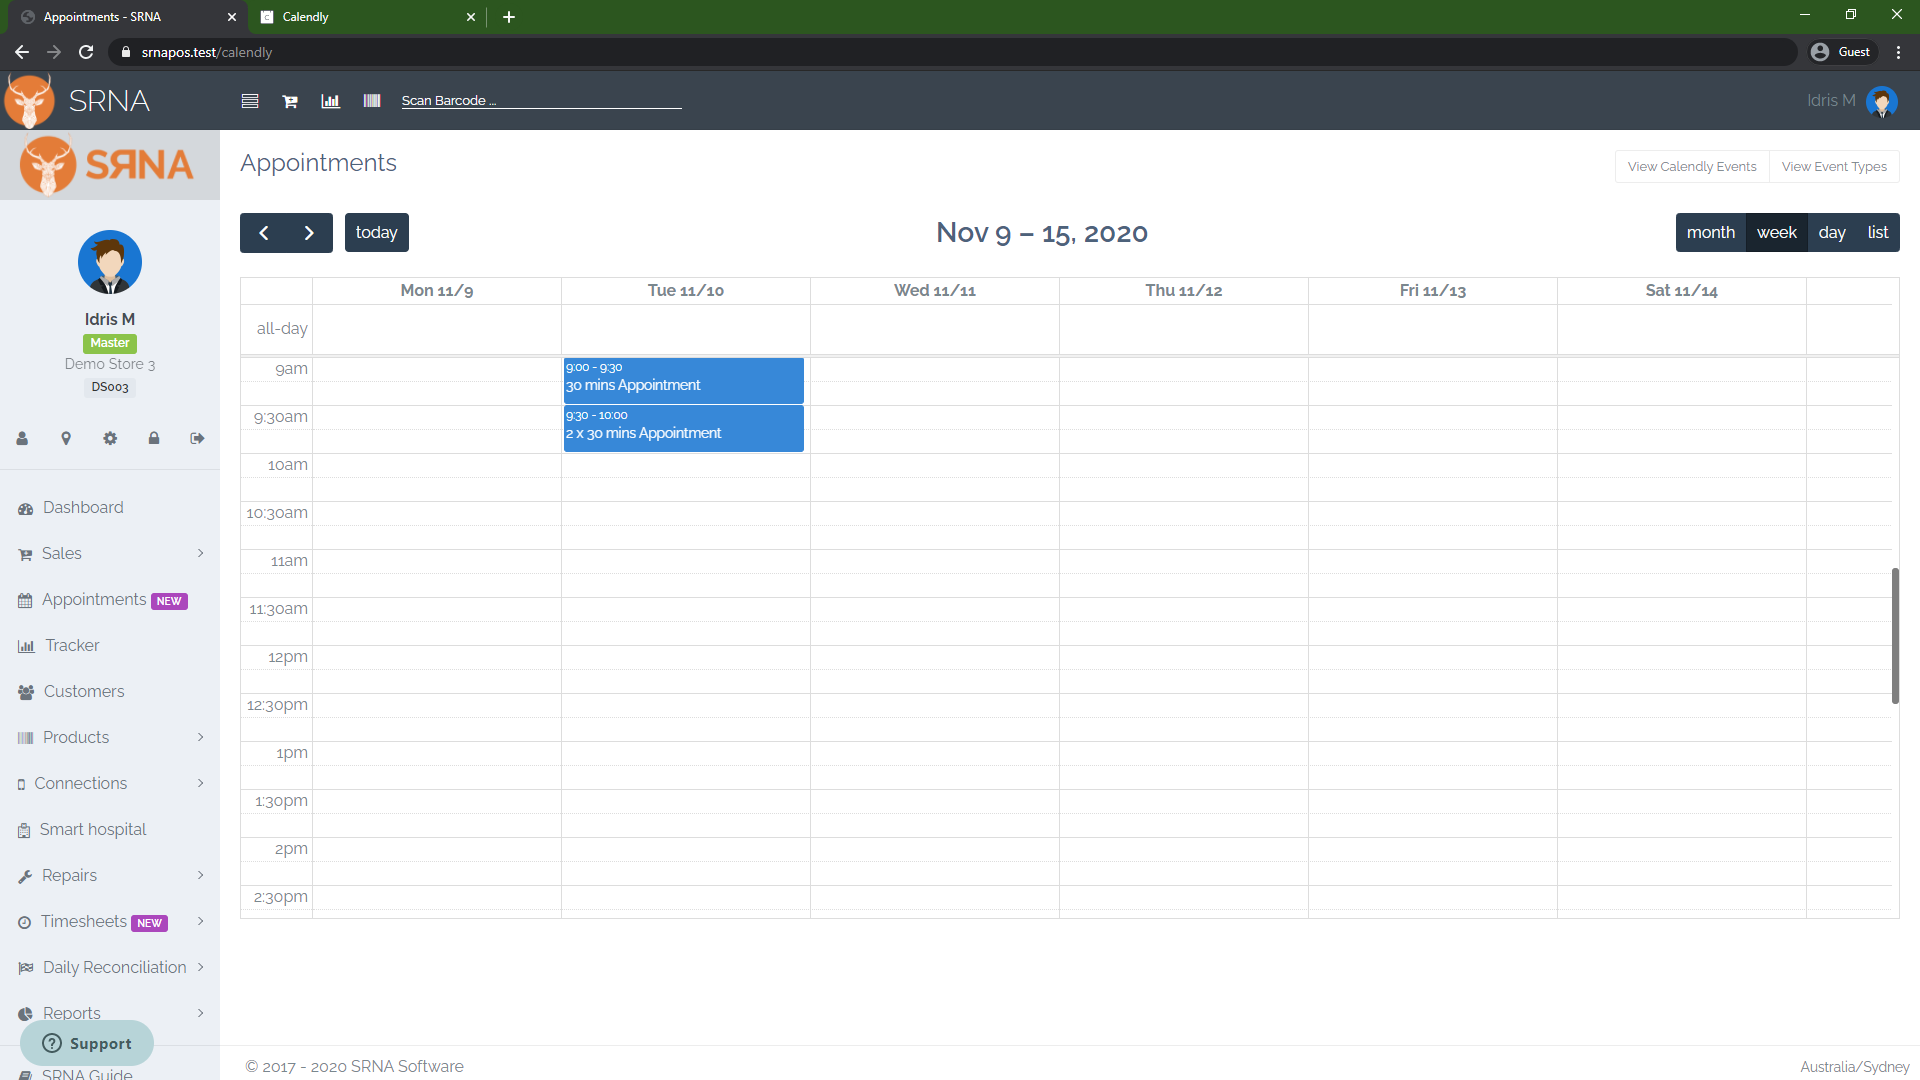
As you can see there are appointments on Tuesday; the first time slot is a single group appointment with one booking. The second slot at 9:30 is a single group appointment with two bookings. To view the appointment details just click on the appointment you want to view, in our case, it will be the appointment at 9:30 AM the one with 2 bookings. A modal will popup and show you relevant information:
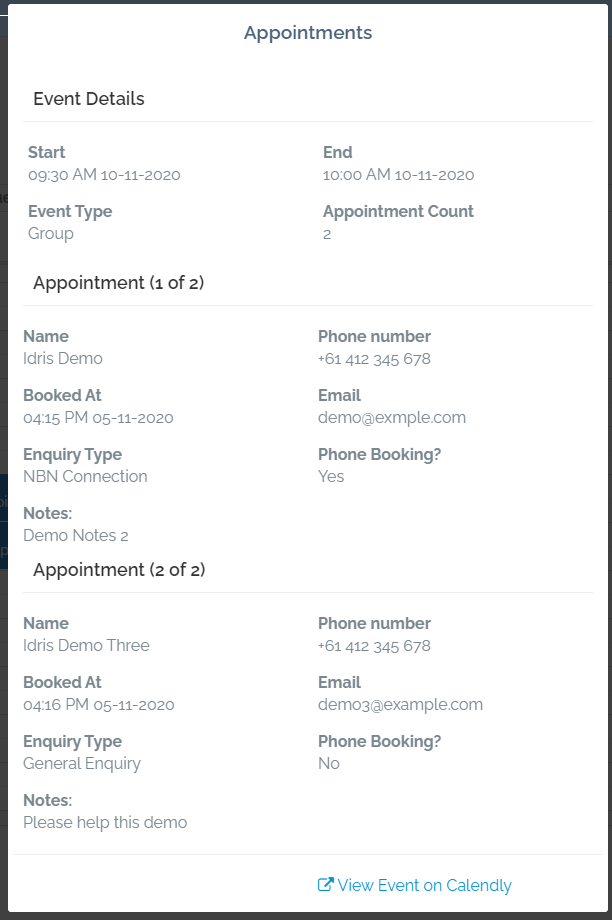
The top section will show the event details such as what time the appointment starts and what time the appointment ends, the event type and how many appointments have been booked within this slot.
The next section is the first appointment booked showing the customers name, their phone number, what time they made the booking at, what email they booked under, and then our other custom questions, Enquiry Type, Phone Booking? and notes.
At the bottom of the modal, there is a ‘View Event on Calendly’ button which will take you to the event details on calendly where you can cancel or reschedule the event which will automatically email all attendees.
Comments
0 comments
Please sign in to leave a comment.