Like many other pages, the stocktake page opens displaying previous stocktakes that have occurred. This is for various admin reasons and they should not be edited by staff.
Before starting a stocktake please note that we strongly advise for stocktakes to only be completed after hours as sales which occur during the day will not be reflected in the stocktake after it has been calculated.
To begin a new stocktake, click the "Begin Stocktake" button in the top right corner.
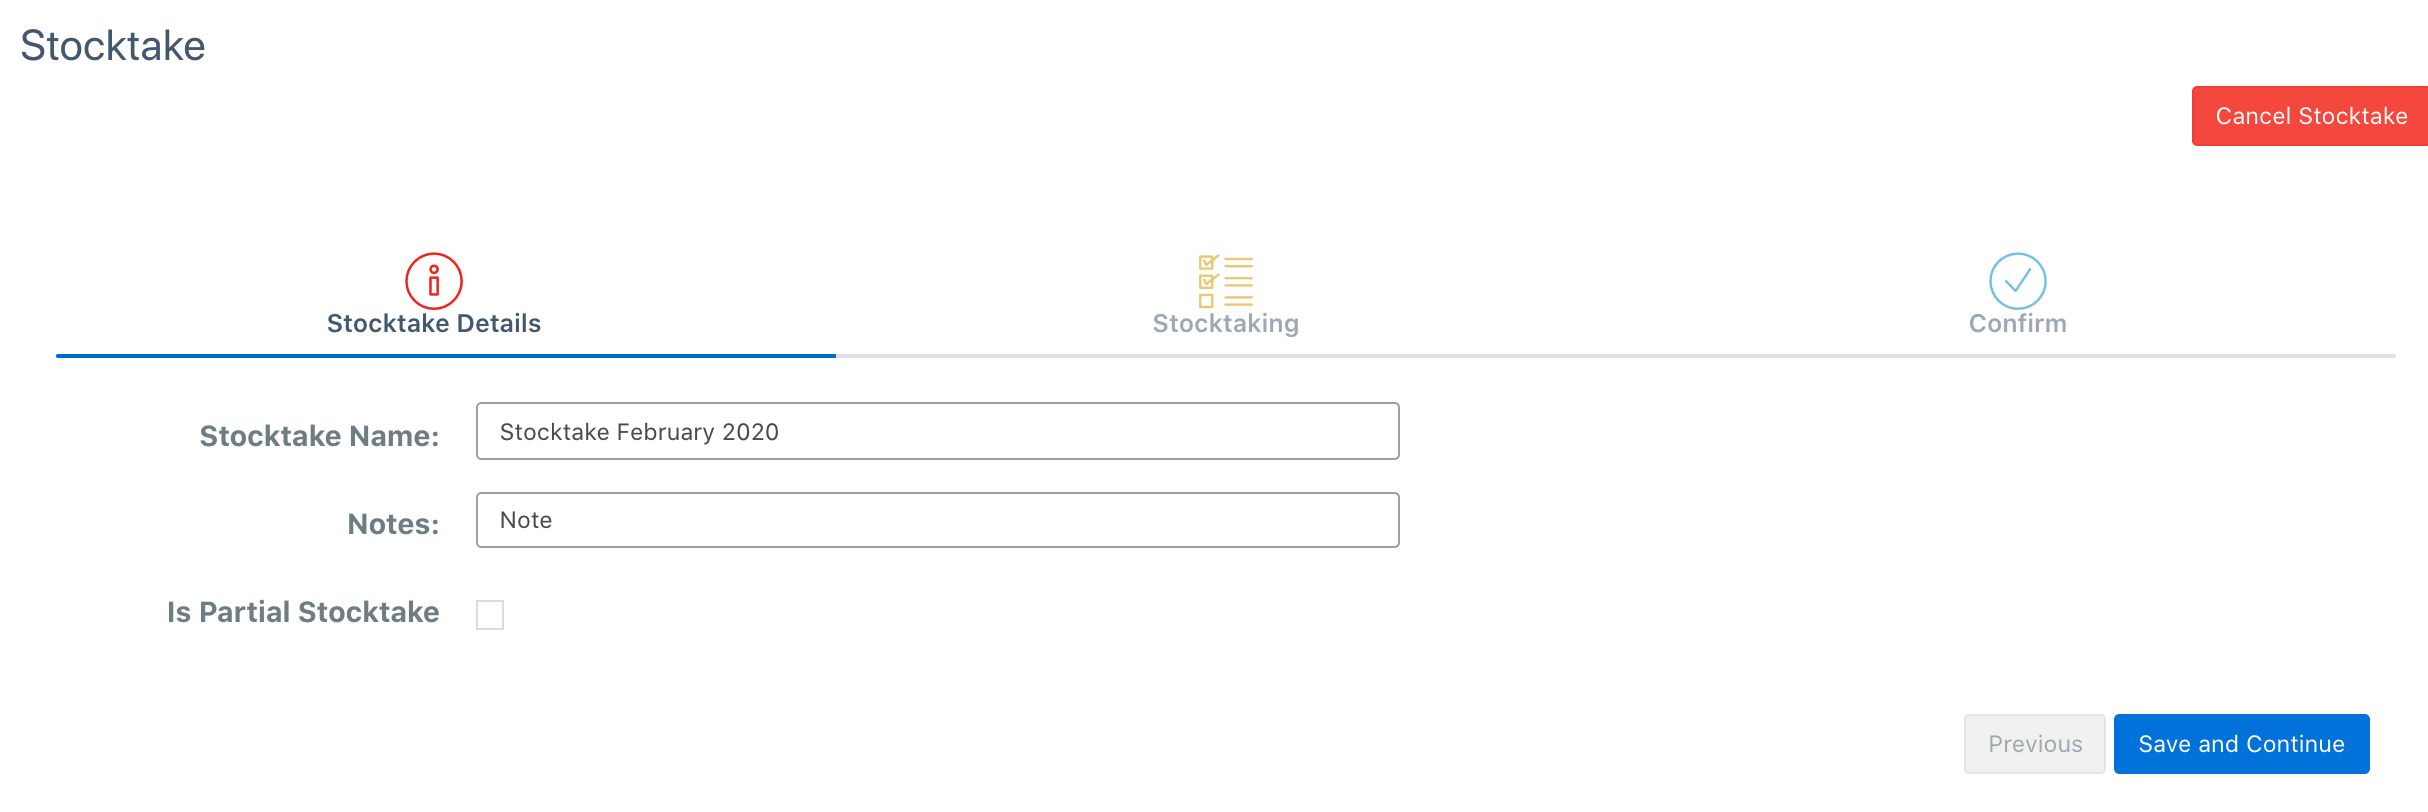
The page will open in the "Stocktake Details" tab and will continue through to each of the following tabs after "Save and Continue" is clicked. Here is a breakdown of each required entry field:
Stocktake Details
Stocktake Name: The name of the stocktake, this is usually the month and year. Please speak to your manager about how they want stocktake records structured.
Notes: Additional notes regarding the stocktake that do not fit into any other field.
Partial Stocktake: Select this option if you are only taking record of a specific category of item e.g. accessories
Stocktaking Category: This option will only appear of the "Partial Stocktake" option is ticked.
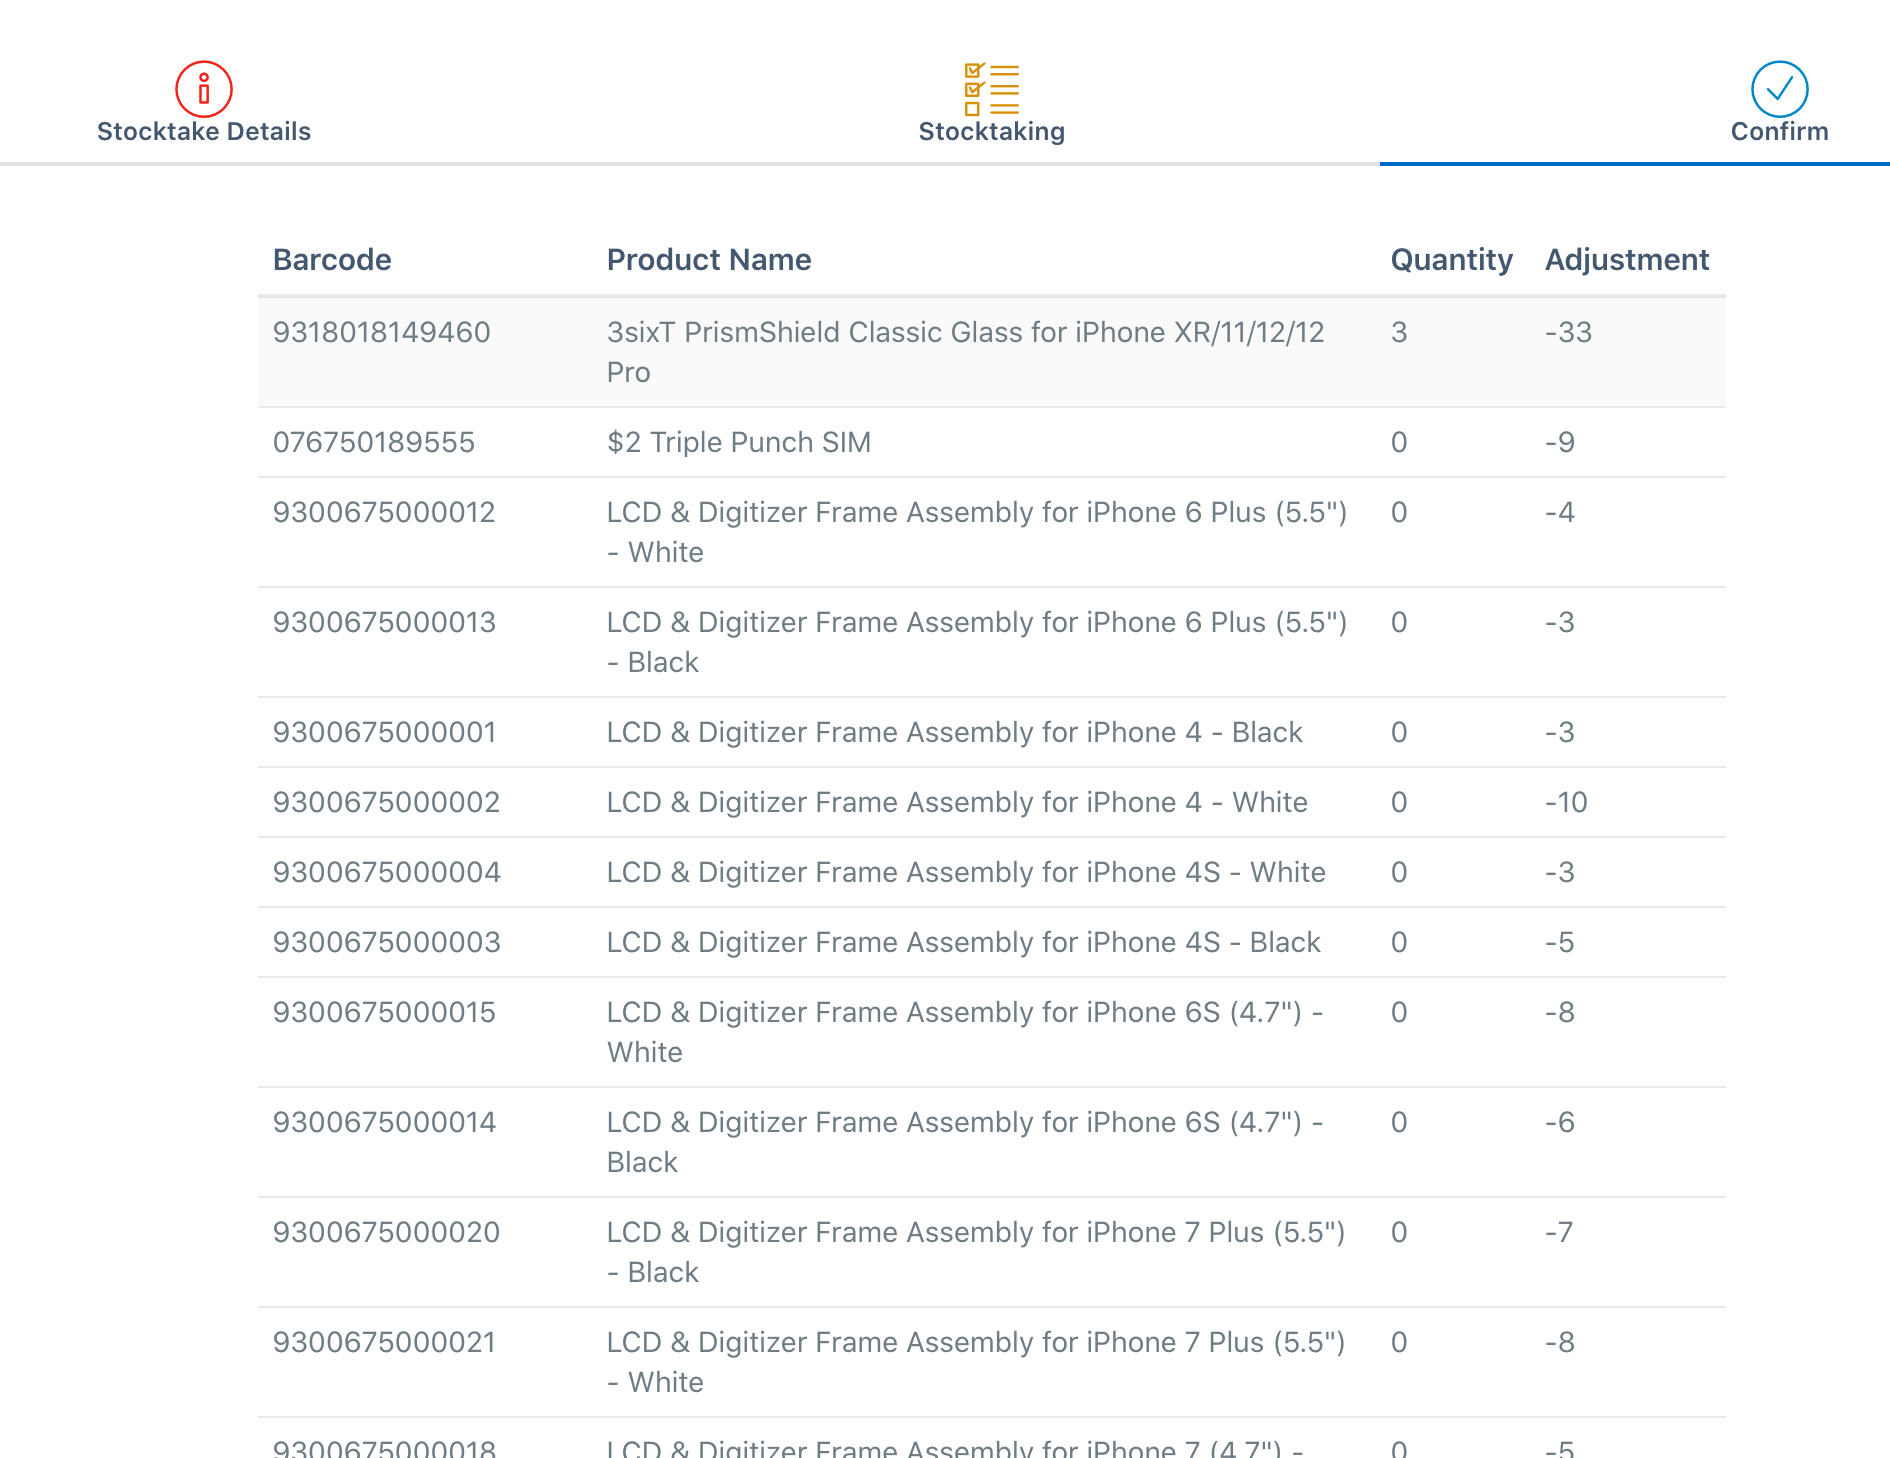
Finish: Once this button is clicked, all products that are taken out of stock are generated in a sale, while products added to stock are generated in an invoice. See the screenshot below.


Comments
0 comments
Please sign in to leave a comment.