
To keep track of inventory you need to add your stock in your system. You can do so by using the receive stock feature. Each time a stock order is received a new supplier invoice is created, you can track its payment due date and payment status as well through SRNA.
View and Search All Supplier Invoices
To view all Supplier Invoices, go to Products -> Receive Stock. This page will show all the invoice details, the payment status (either paid, count down to due date or not paid if its overdue) and the invoice status (Not Processed, Stock Processed, Complete).
![]()
If you are searching for a specific invoice, make sure you have the correct date range selected as it will only display invoices within that date range. If you are struggling to find the invoice you are searching for please try using the filters which can be found by clicking the search filters button in the top right of the page.
Receive Stock
To receive stock go to Products -> Receive Stock(GR) and click on 'New Supplier Invoice' button in the top right corner.
Receiving products is made of 3 steps:
- Invoice Details
- Product Items
- Invoice Payment Details
1. Invoice Details
To start receiving you must first copy the invoice details, the Invoice Number and Supplier are required fields. The system will not allow you to add items in your invoice until you have added those fields. Date Received is used in calculating the time difference between the date received and the date a device is sold, to determine if it falls within the consignment range.
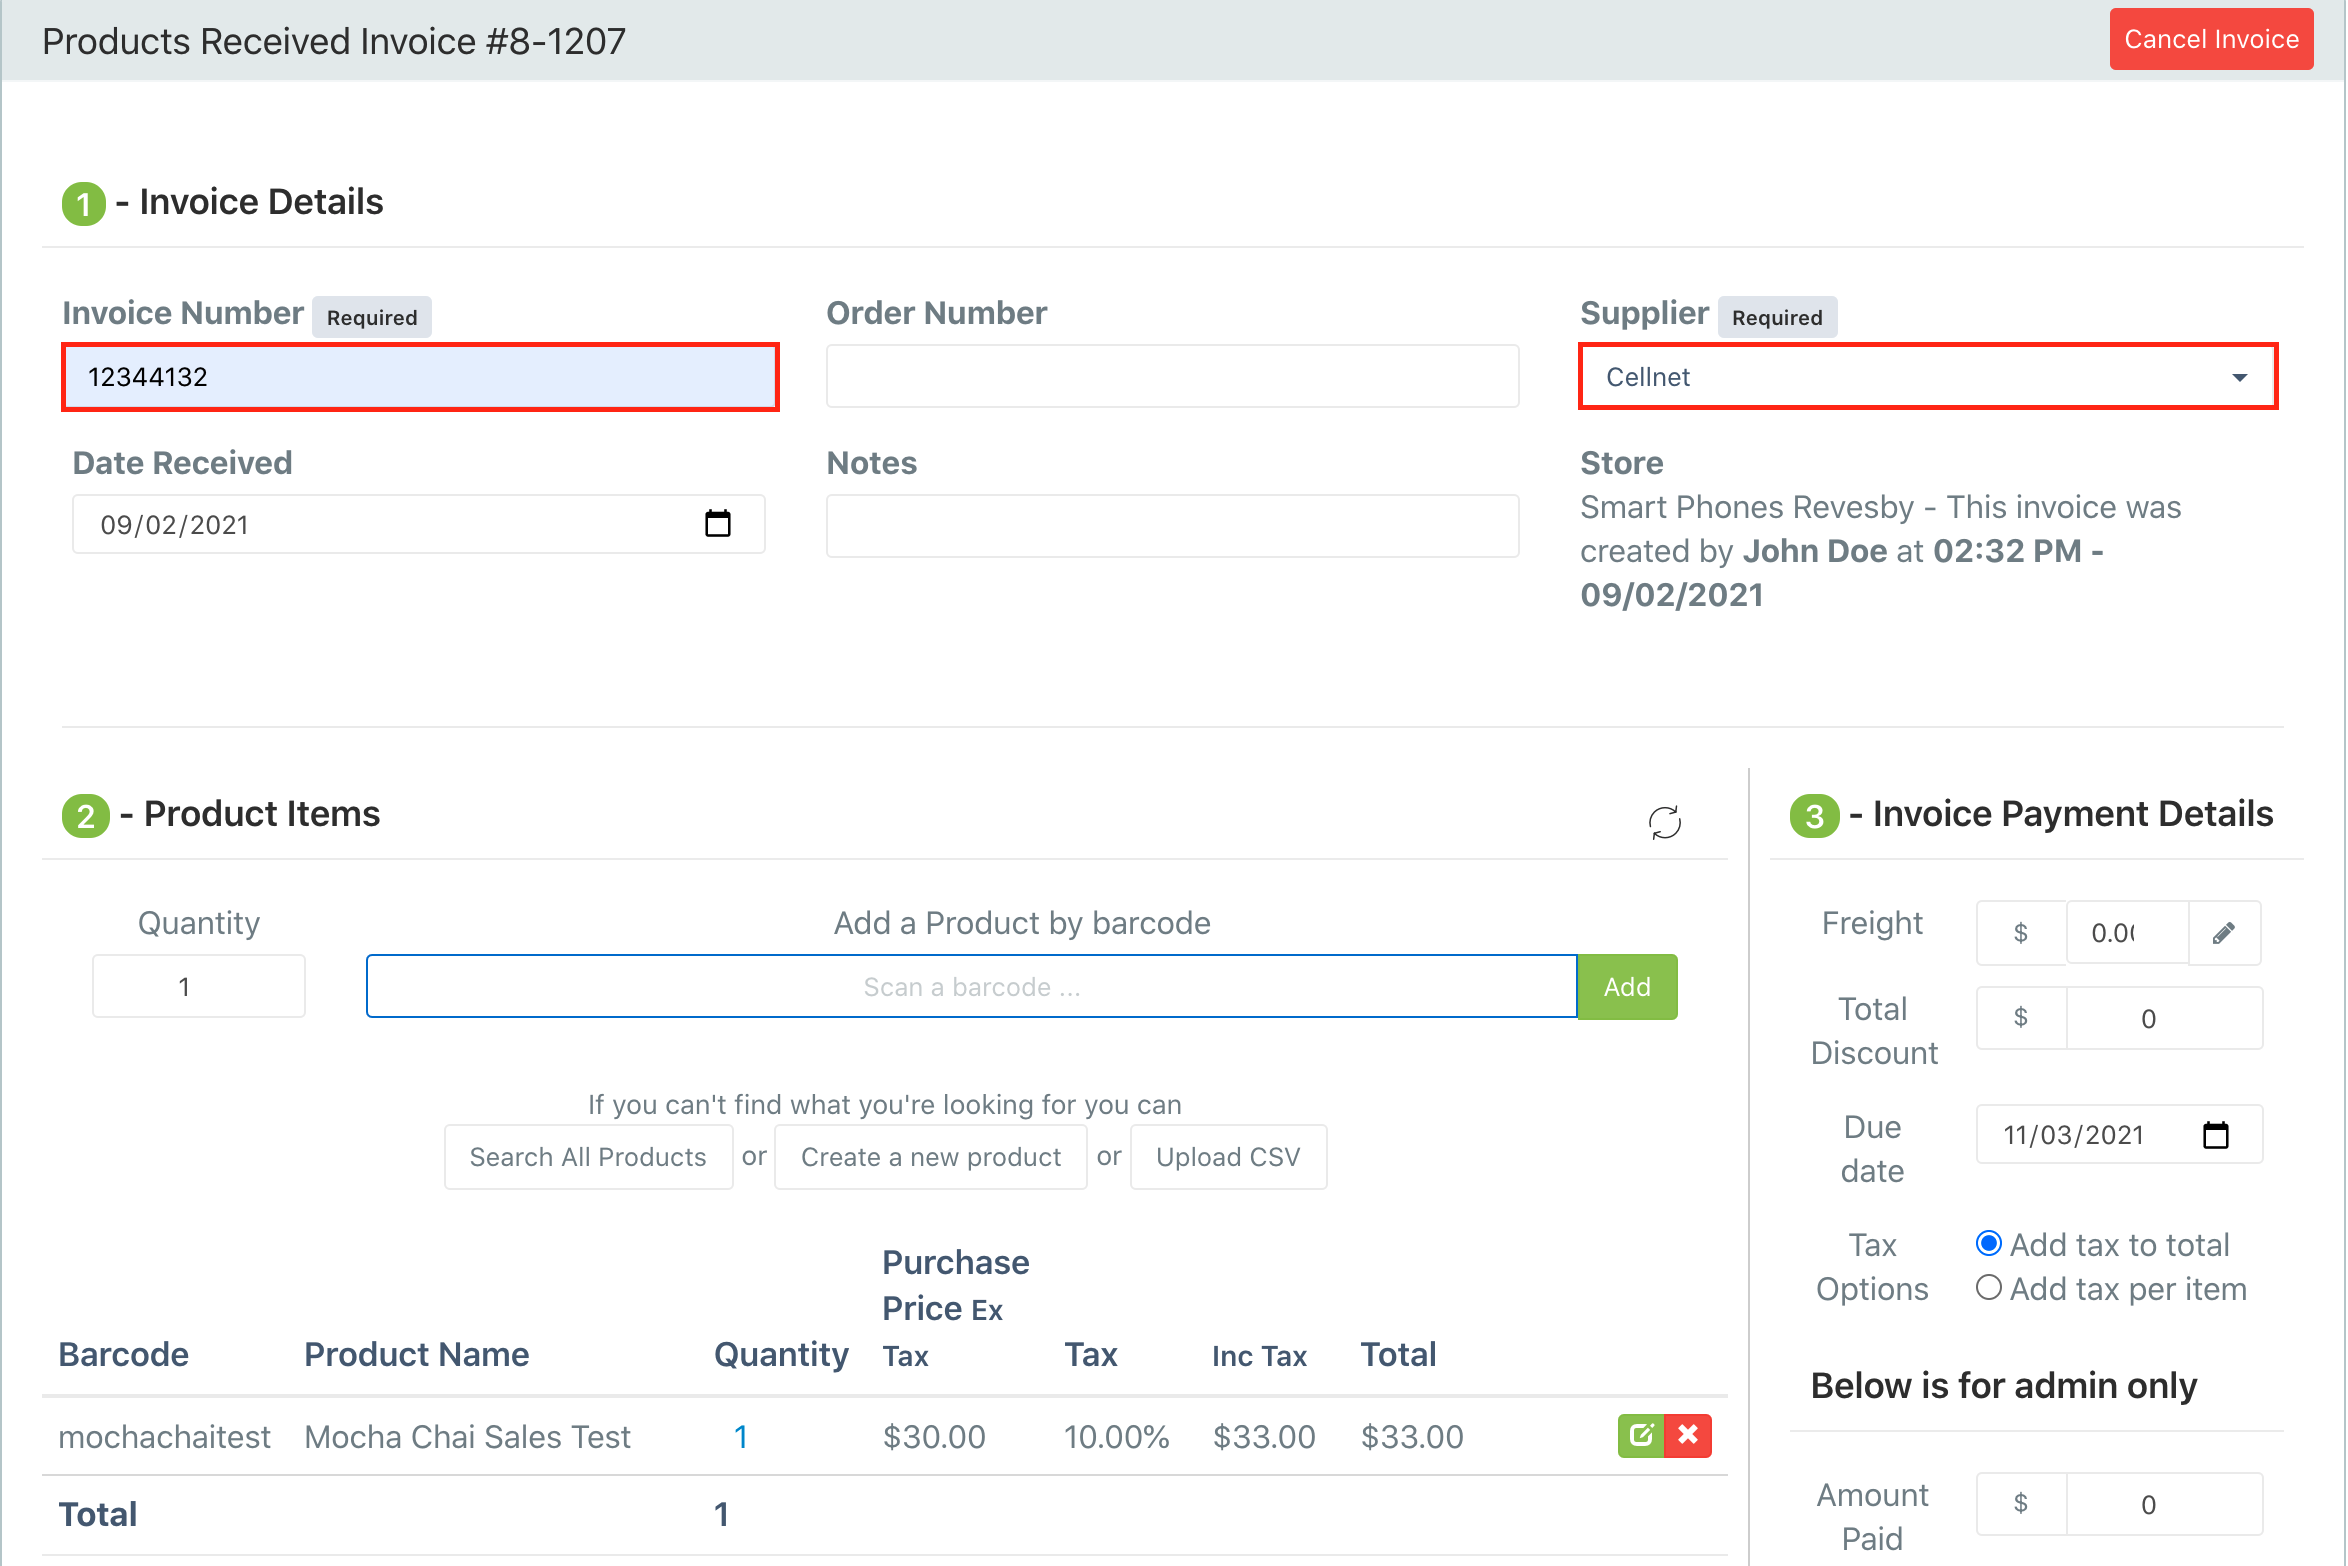
2. Product Items
Adding stock items
You can add item by either scanning the barcode in the "Add A Product By Barcode" section, or using the "Search All Products" feature
You also have the option to "Create a new product" and then add it.
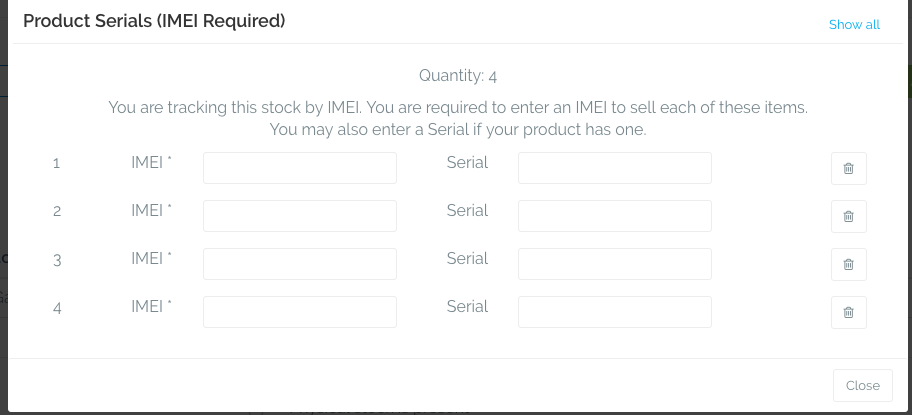
Changing quantity
You can set the quantity you of the item that you are receiving in the quantity input field before adding a product.
You can also change the quantity after adding the product by clicking on the quantity number, which will open a "Change Quantity" window where you can replace the current quantity with the new quantity.
If you are increasing the quantity of a product that is tracked by IMEI/Serial a window will be displayed after you apply the quantity change to request the additional IMEIs and Serials this also applies for reducing quantity.

Change Price
You can change the price by clicking on the "Edit Product" button, which will display the purchase price field for you to edit the price. Ensure to click save after you change the price.
Once the purchase price is changed to a price different than the store's default purchase price, the system will ask you if you would like to set the newly set purchase price as default for your current store.
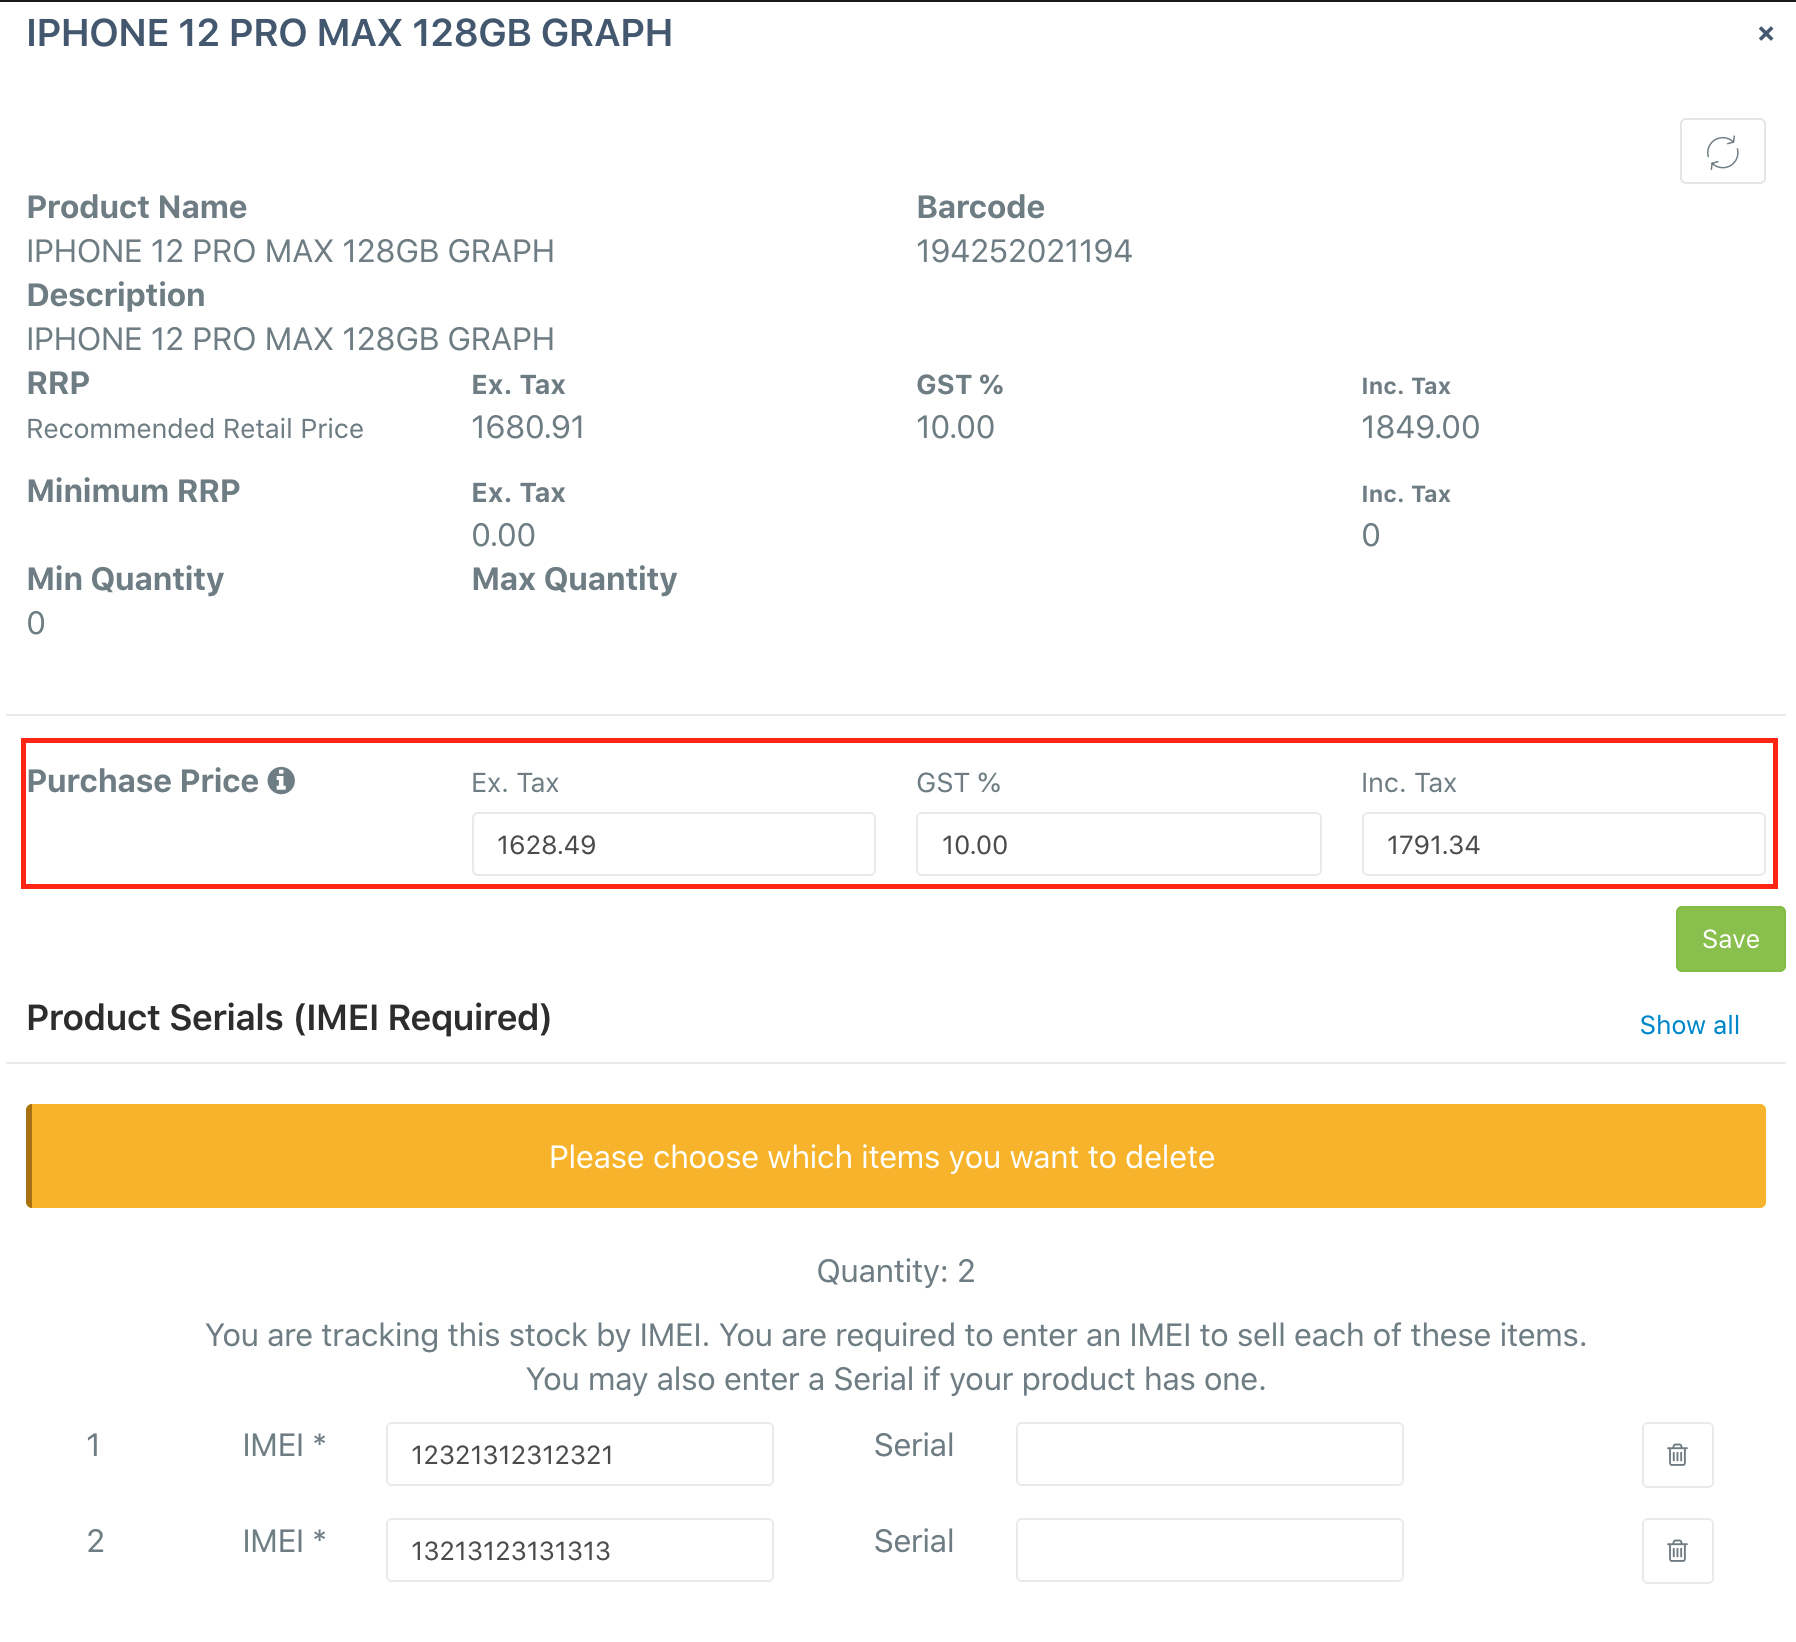
Receive Serialised Stock (IMEI/Serials)
To receive serialised stock, first, you must scan the barcode of the product, then you will be prompted with a window to enter the IMEIs and Serials related to that product. If a product is tracked by IMEI you can save both IMEIs and Serials but the system will only require the IMEI and vice versa.
The IMEI/Serials will be autosaved if they are valid when you click out of the IMEI/Serial field.
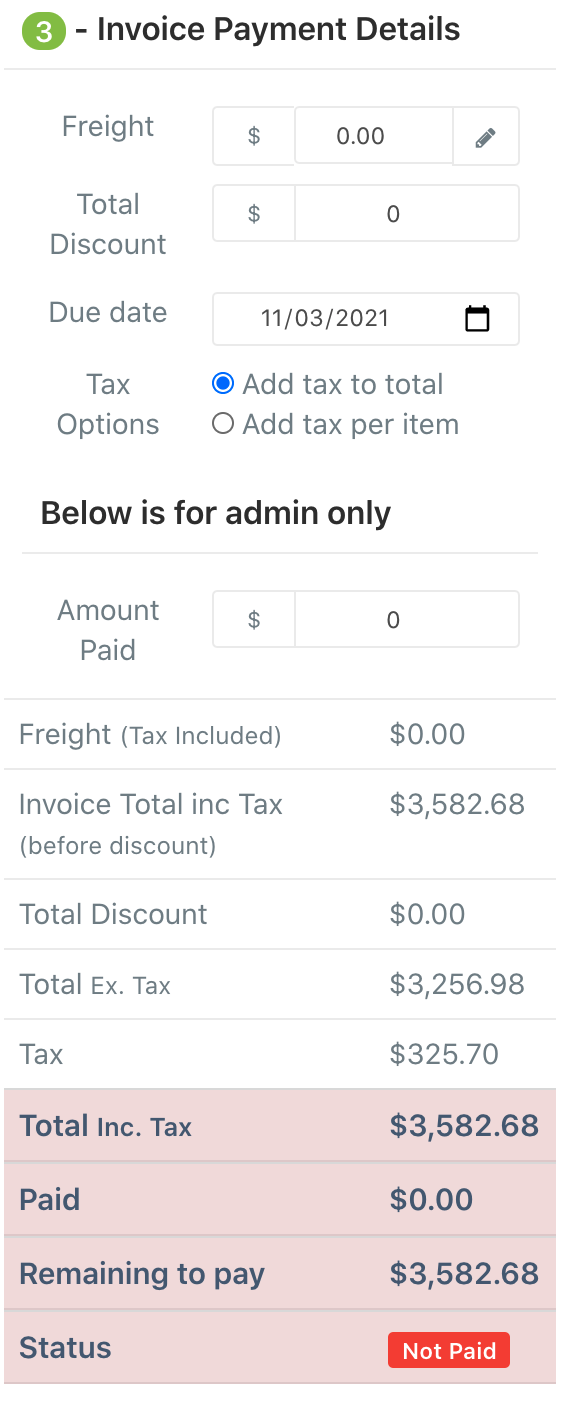
3-Invoice Payment Details
Copy the details from your supplier invoice provided to you in this section.
Process Stock
After adding all the information into your supplier invoice, double-check that all the products are entered correctly with the correct price, if it is all correct then check the "Physical stock is present" box and click on Process Stock.
Once stock is processed you will not be able to edit the supplier invoice anymore. Authorised users will still be able to make changes to the invoice details and invoice payments details but not the products.
Complete Supplier Invoice
Freight: This is the freight paid on your invoice. Freight will automatically include 10% tax. If you did not pay tax on the freight, you can remove it by clicking the edit button on the right of the freight input section, change the tax to 0% and click save. Readjust the freight amount after removing the tax.
Total Discount applied: This is the discount applied on the invoice
Due date: This is the date the invoice payment is due.
Tax options: There are multiple ways in which systems sum the tax on invoices. Either they add it to total or they add it to each item then sum it up.
- Add tax to total option will sum the purchase prices ex. tax then will add the tax to the total.
- Add tax per item option will add the tax to each item first then it will sum the total.
Admin Section
Amount Paid: This is the amount that has been paid so far. You can use this section to track how much you've paid back of the invoice so far.
Finally, this task should only be done by an authorised user. Click "Complete" will close your invoice meaning that it has been paid and reconciled.
Comments
0 comments
Please sign in to leave a comment.